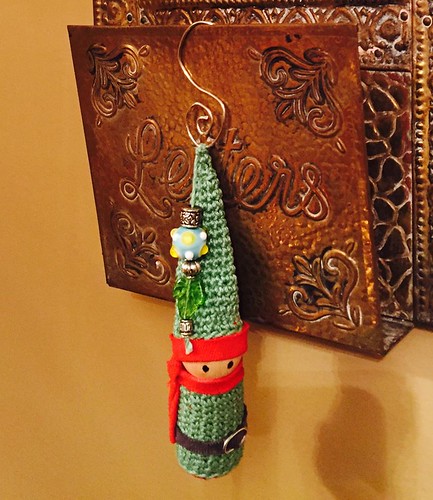
Ain't she a cutie?
I could have chosen to use felt for the non-crochet bits of this project, too, but I don't like the "hand" of felt as much in such a small doll as I like t-shirt fabric. In a small project, the t-shirt fabric has a more realistic/nicer drape. As I recycled my son's t-shirts into a quilt this year, I have many colors of t-shirt scraps left over. But you can use felt, if you prefer. Felt is very Christmassy, too.
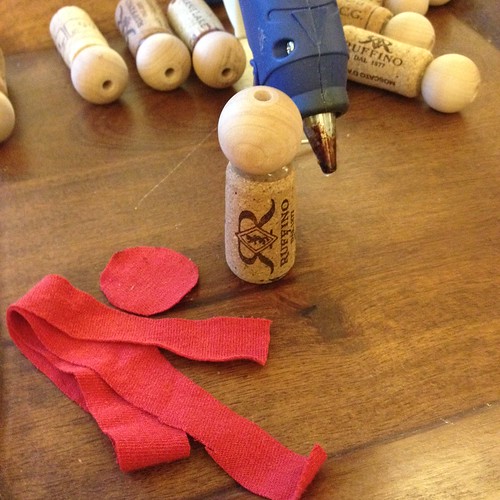
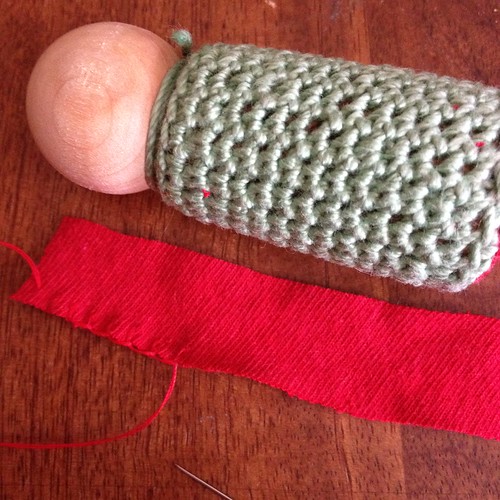
Start by cutting a circle of your chosen fabric. For an elf, I wanted to use red as a contrast, but you can match your crochet thread, if you like. I also cut a strip for the hat headband and scarf. Use the photo for scale, I just eyeballed it.
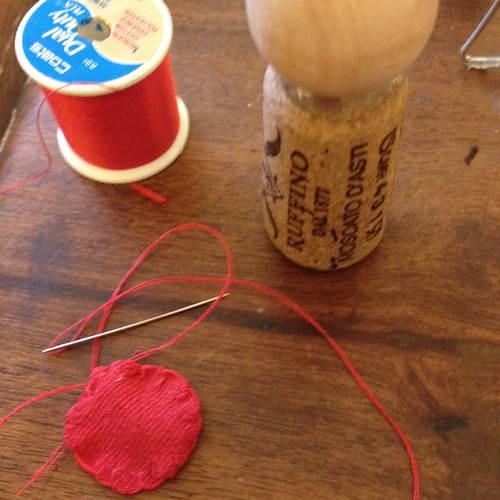
Next with a fine needle and regular matching thread, blanket stitch around the circle. The stitches should be small, about the size of a single crochet stitch.
(Wonders if Margaret Atwood crochets?)
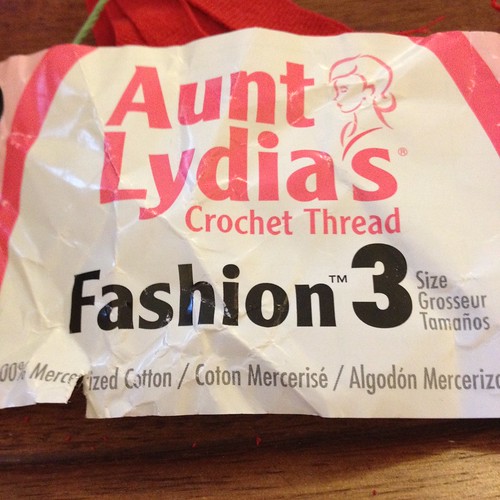
I chose size 3 crochet thread for this. This is as large as you should go, IMO. Anything larger will give you something too bulky and out of scale. It will look less like her mama crocheted her a sweater and more like some fumbling hooman accosted her with a crochet hook.
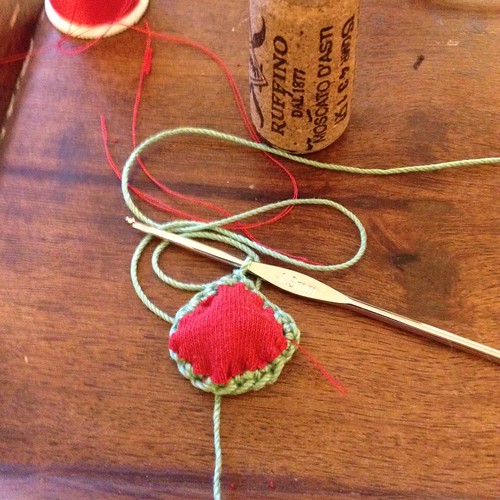
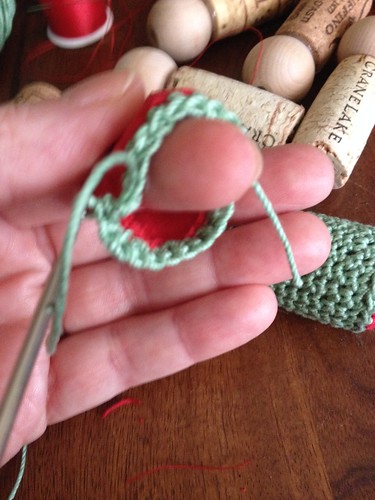
Pull a loop of your crochet thread through any single blanket stitch, then single crochet all around the circle. Be careful not to pull your stitches too tight!
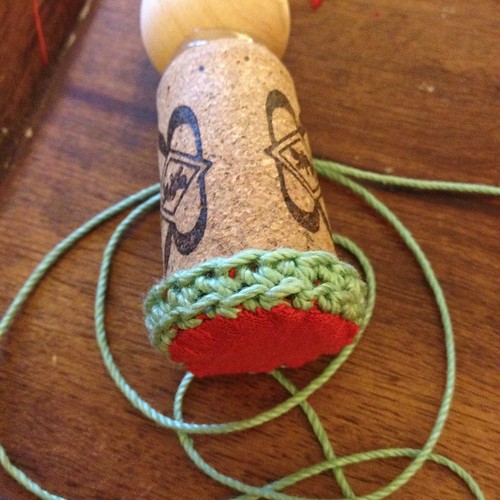
For the second round, single crochet into back loops only. Then check to make sure the proto-sweater fits snugly but not tightly around the bottom of your cork doll.
For all the remaining rounds, just single crochet. I crocheted with the sweater in place, but you don't have to. Just check the fit every few rounds to make sure your stitches aren't too tight.
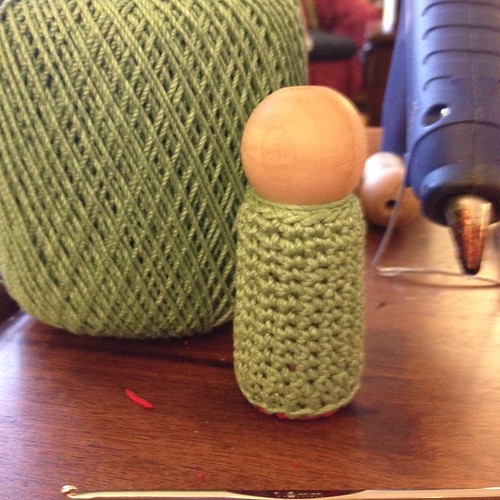
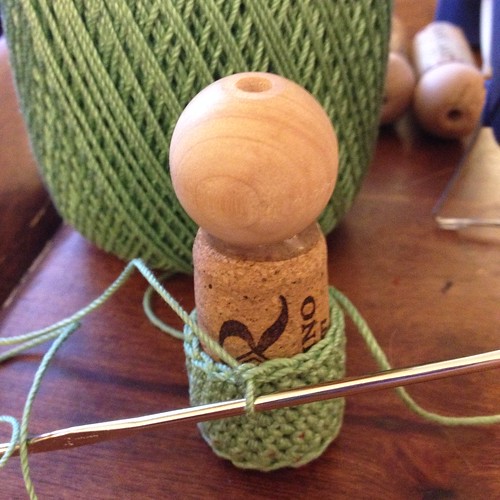
You can either stitch the "neckline" with the sweater on the doll, which I chose to do, or you can use a yarn needle use a running stitch to snug things up at her neck.
Next is the hatband. You will want this to be able to fold up, so make it twice as wide as the space you want covered. Measure around the head with a little overlap, and cut. Here also, you blanket stitch, but unlike in this photo, I found it works better to sew closed the loop with a seam up the back first, then sew around the loop.
Again, pull a loop of crochet thread through and single crochet all around. I prefer to crochet the second row back loops only, but this isn't critical. Every row above that, drop one stitch, over the seam in the hatband. This will be the back of the hat. It gets a little tricky as you reach the top. at the very top, chain two to finish. Leave a good few inches of crochet thread for the beads.
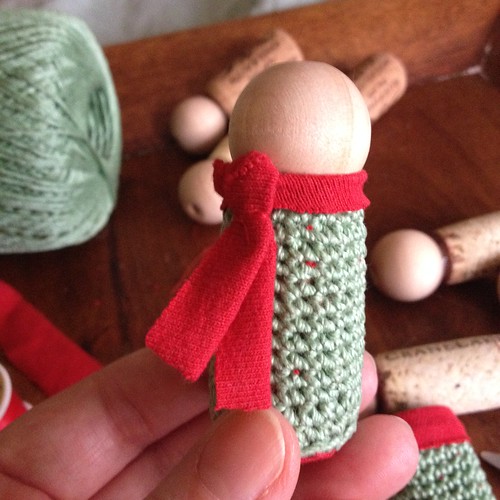
Fold the rest of the fabric strip in half lengthwise and artfully tie it around the doll's neck. Using the matching sewing thread stitch in place a "knot"
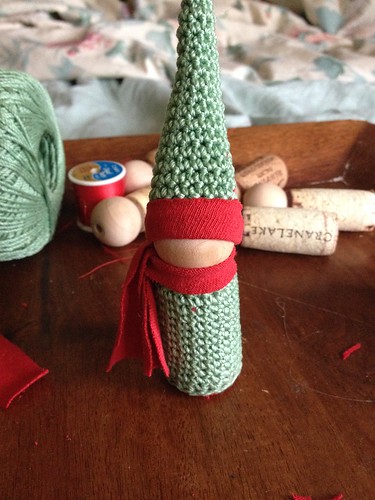
Fold hatband in half, or "up" over the bottom row of crochet. Glue hat into place. I used hot glue, but had bad results on another peg doll with hot glue. So, I recommend NOT using hot glue. You want to use a glue that stays wet long enough for you to move the hat to exactly where on her head you want the hat to sit. Hot glue locks the hat in the first place you set it, like it or not, "cute" or not. Of course, if you use slow set/slow dry glue for better results, you will need to let the glue dry completely before moving on to the next step.
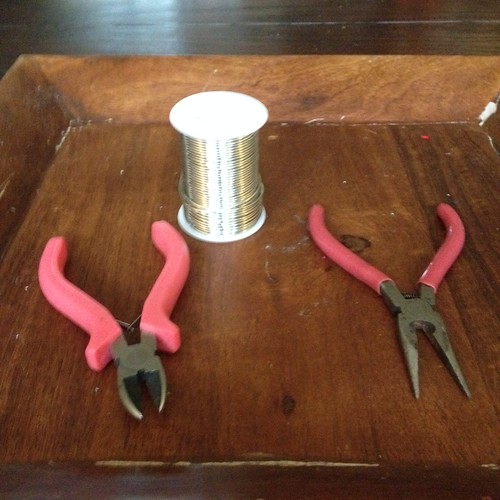
Next you will need a tiny buckle. Or, you will need some wire and some tools. I *think* this is 16 gauge. Not sure. I like silver for elves and Santas and such.

Using flatnose pliers, bend an end of wire 90 degrees, then wrap the wire all the way around.
You will wind up with something like this. Use dykes to snip it off the wire. There is your buckle. Cut a strip of fabric the width of your buckle and the distance around your cork. I used grey. Threat the "belt" through the "buckle". Hot glue is prefered for gluing this into place, or you can stitch it.
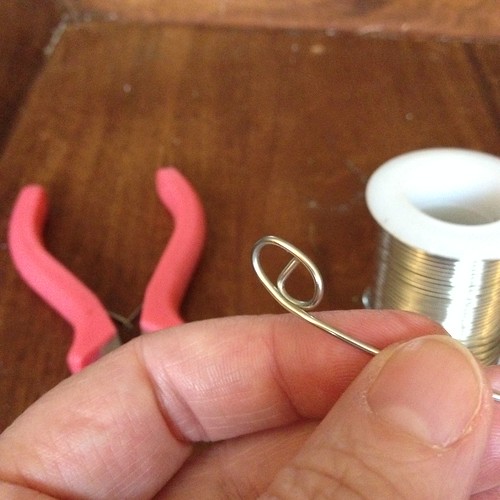
Thread a piece of that same wire through the chain at the top of the hat, then use round nose pliers to work it into a swirly "s" hook. On that left over crochet thread at the top of the hat, thread some glass and silver beads, then a crimp bead. Use flatnose pliers the crimp the bead flat.
Leave the face blank if you like. That is the Waldorf style. If you like a face like the one on mine, I made two dots with a Sharpie, and make her cheeks rosy with a some blush and an eyeshadow brush.
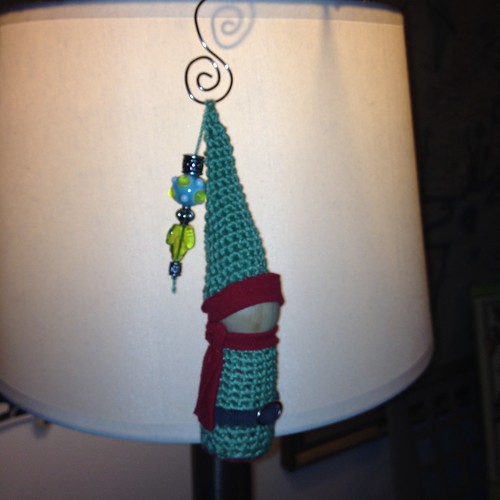
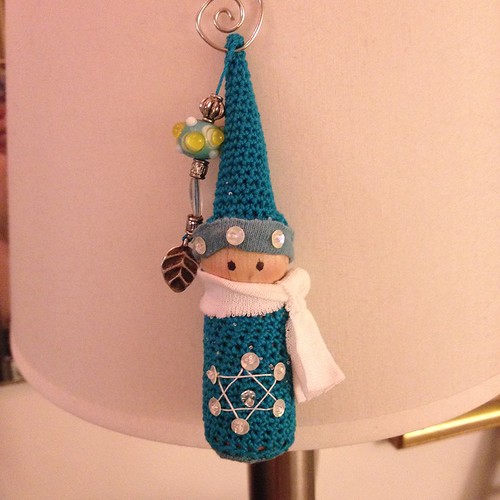
Make many in different colors, and give as gifts. Or tie to gift wrapping. Or just keep for your own tree. For our Jewish friends and family, I also made a "Hanukkah gnome". See how her hat is crooked/rumpled? This illustrates the problem with using hot glue for the hat. Don't!
Merry Christmas, Happy Hanukkah, and all that!
